русский
 English
 Español
 عربى
عربى Deutsch
 Français
Контент
- 1 Choosing a Structurally Adequate Support Frame or Beam
- 2 Attaching the Top Connection: Hanger Hardware to the Support Beam
- 3 Attaching the Seat: Chain, Rope, and S-Hook Connections
- 4 Adjusting Seat Height and Suspension Length Correctly
- 5 Pre-Use Inspection Checklist Before First Use
- 6 Routine Inspection Schedule for Ongoing Safety
- 7 Ground Surfacing Beneath the Swing
- 8 Common Installation Mistakes That Compromise Security
- 9 Frequently Asked Questions About Securing a Children Swing Seat
- 9.1 What weight capacity should a swing seat and its hardware be rated for
- 9.2 How often should swing chains be replaced
- 9.3 Is it safe to hang a swing seat from a tree branch instead of a dedicated frame
- 9.4 What should I do if I notice a connection point has started to wear during a routine inspection
To properly secure a Children Swing Seat, you must correctly attach the suspension chains or ropes to the seat using the manufacturer-specified connection hardware, hang the seat from a structurally sound support beam at the correct height and clearance, and verify all hardware is torqued and locked before any child uses it. The three connection points that require the most attention are the seat-to-chain attachment, the chain-to-hanger attachment at the top beam, and the S-hook or shackle closures at both ends -- a failure at any one of these three points is the most common cause of swing-related injury incidents involving equipment failure rather than user error.
Beyond the initial installation, secure use also depends on routine inspection of these same connection points, since chain links, S-hooks, and rope fibers all experience wear from repeated dynamic loading and weather exposure over time. The sections below cover the complete installation and inspection process in detail, along with the specific standards that govern playground swing safety.
Choosing a Structurally Adequate Support Frame or Beam
Before any seat is attached, the support structure itself must be confirmed adequate for swing loading, which is dynamic rather than static and therefore generates forces considerably higher than the simple weight of a child sitting still.
Understanding Dynamic Load on Swing Structures
A swing in motion generates forces well beyond the static weight of the occupant due to the pendulum motion and the additional momentum created by pumping or pushing. Playground equipment engineering references, including ASTM F1487 (Standard Consumer Safety Performance Specification for Playground Equipment for Public Use), require support structures to be designed and tested to withstand dynamic loading conditions specifically, not simply the static weight of the heaviest expected user. As a general engineering guideline reflected in commercial playground design practice, support beams and their connection points should be rated to withstand at least 4 to 5 times the static weight of the heaviest anticipated occupant to provide an adequate safety margin against the dynamic forces generated during active swinging.
Beam Height and Ground Clearance Requirements
The support beam height determines both the usable swing arc and the ground clearance beneath the seat at rest. The U.S. Consumer Product Safety Commission (CPSC) Public Playground Safety Handbook recommends a minimum ground clearance beneath a stationary swing seat of between 305 mm and 380 mm (12 to 15 inches) to allow safe entry and exit without excessive seat height, while ensuring sufficient arc clearance during active use. For home installations using a single support beam such as a tree branch or a dedicated swing set frame, the beam itself must be confirmed sound -- free of rot, cracking, or structural damage -- and rated for the combined dynamic load of all swings to be hung from it if more than one seat shares the same beam.
Spacing Between Multiple Swings on the Same Frame
When multiple swing seats are installed on the same frame, adequate spacing prevents children from colliding with each other or with the frame's support posts during active use. The CPSC Public Playground Safety Handbook recommends a minimum spacing of 610 mm (24 inches) between adjacent swing seats and a minimum of 760 mm (30 inches) between a swing seat and the support frame upright. These dimensions should be measured with the swings at rest, as the active swing arc requires this clearance to remain safe throughout the full range of motion.

Attaching the Top Connection: Hanger Hardware to the Support Beam
The top connection -- where the chain or rope attaches to the support beam -- bears the full dynamic load of the swing and is one of the three critical attachment points referenced in the direct answer above.
Selecting the Correct Hanger Type
Most swing installations use one of two hanger configurations: a closed-eye hanger bolted or screwed directly into the beam, or an open hook-style hanger that allows the chain to be looped over it. Closed-eye hangers, which fully enclose the chain or rope connection point, are considerably more secure than open hooks because they eliminate the possibility of the chain working loose and disengaging from an open hook under repeated swinging motion -- a failure mode that has been documented in playground injury case reviews referenced in CPSC incident data. For any installation expected to see regular, active use by children, a closed-eye or fully enclosing hanger design is the safer choice.
Installing Hanger Bolts or Screws Correctly
Hanger hardware installed into a wooden beam should use a lag bolt or eye bolt rated for the expected dynamic load, installed into solid wood away from cracks, knots, or the beam's end grain, all of which significantly reduce the wood's holding strength. The hole for the bolt should be pre-drilled to a diameter slightly smaller than the bolt's threaded shaft to allow the threads to engage the wood fibers fully without splitting the beam. Hanger bolts should be tightened until snug against the beam surface with the eye oriented in the plane of the swing's motion, allowing the chain to move freely without binding against the beam or rubbing on an unintended surface.
Confirming Adequate Embedment Depth
The bolt or screw embedment depth into the beam material directly determines pull-out resistance under load. As a general guideline for wood-frame swing installations, hanger bolts should achieve a minimum embedment depth of at least 75 mm (3 inches) into solid, sound wood, with manufacturer specifications for the specific hanger hardware taking precedence where provided. Shallow embedment is one of the most common installation errors in home swing set assembly and significantly increases the risk of the hanger pulling free from the beam during active use.
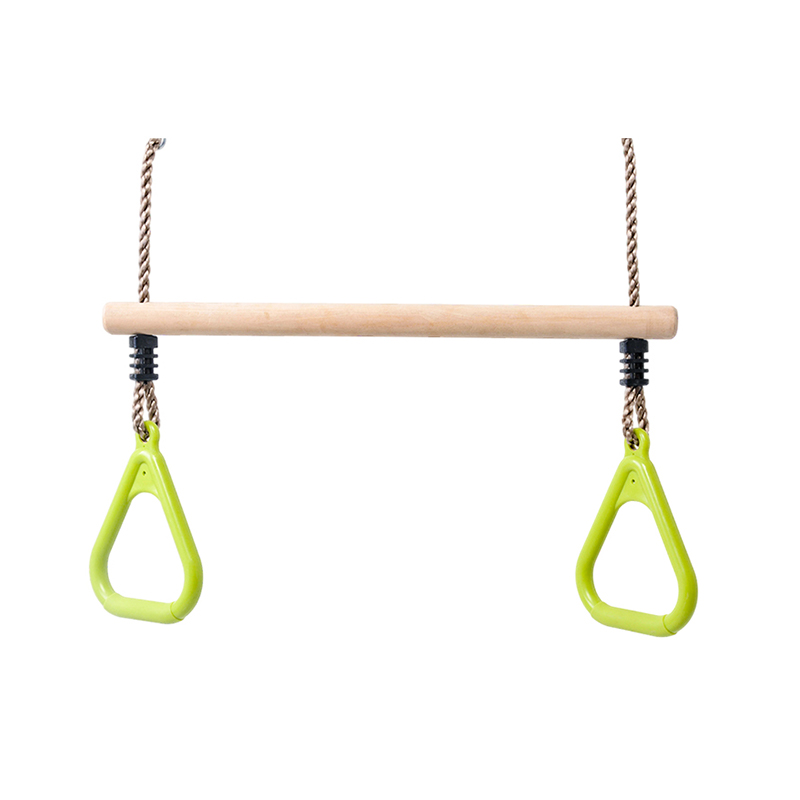
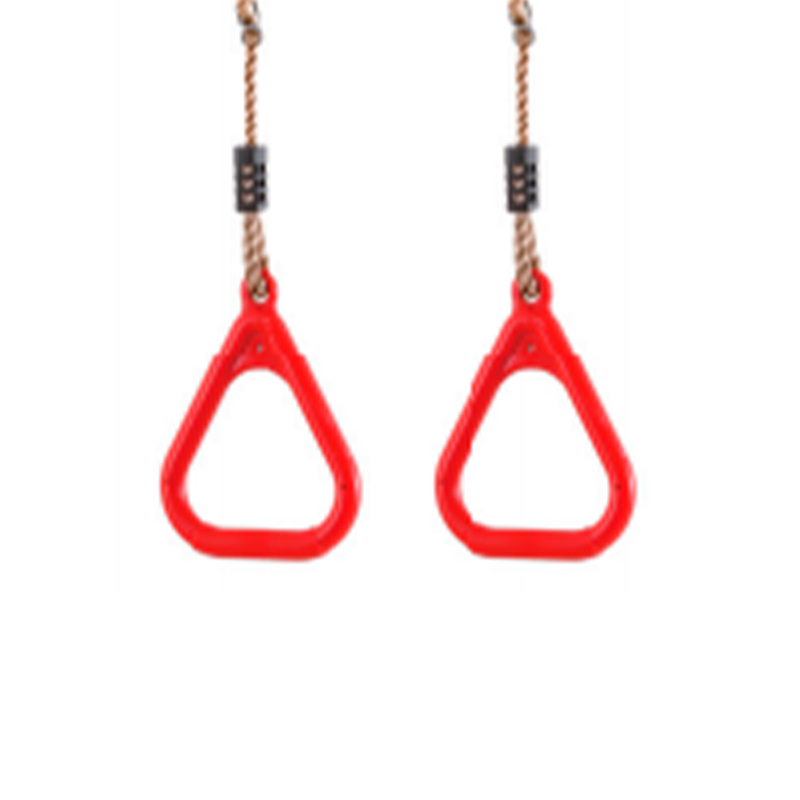
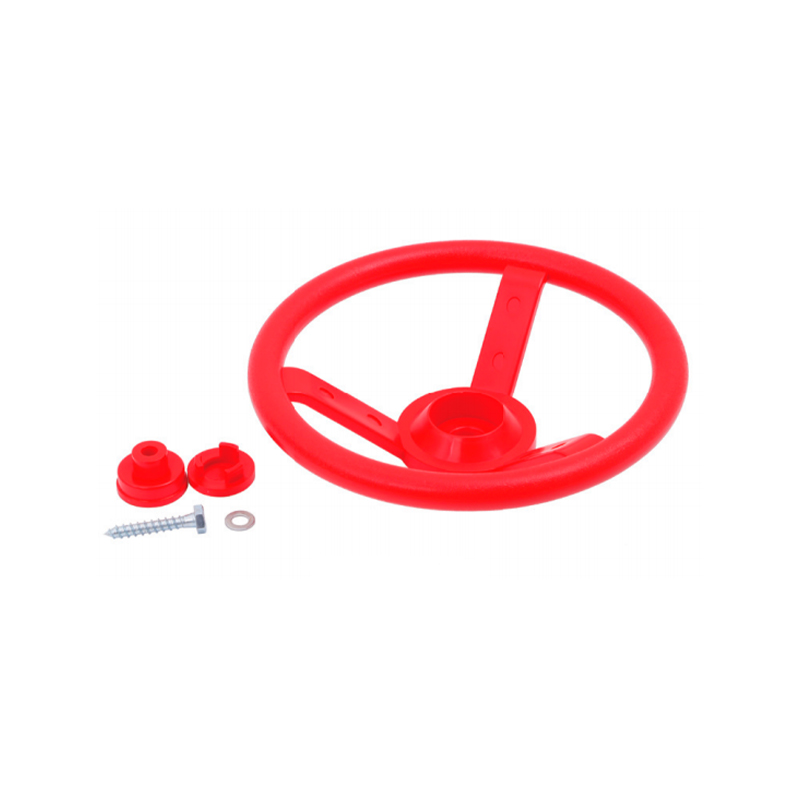
Attaching the Seat: Chain, Rope, and S-Hook Connections
The connection between the swing seat itself and the suspension chain or rope is the attachment point closest to the child and requires equally careful attention to ensure it cannot separate during use.
Closing S-Hooks and Carabiner-Style Connectors Fully
Most swing seats connect to their suspension chains using S-hooks, which must be fully closed (crimped shut with pliers until the gap is eliminated) after installation to prevent the chain link from working its way out of the open hook gap through the repetitive motion of swinging. An S-hook that has not been fully closed is one of the most frequently cited installation defects in playground equipment safety inspections, because the open gap is not always obvious on casual visual inspection but becomes a clear separation risk after repeated dynamic loading. Many modern swing seat kits, including properly specified Children Swing Seat products, are now supplied with locking carabiner-style connectors or crimped closed-loop connections specifically to eliminate this installation-dependent risk.
Verifying Chain Link Integrity and Coating
Swing chains should be made from coated or galvanized steel rated for outdoor exposure, with a minimum breaking strength substantially in excess of the expected dynamic load. Chain links should be inspected for any signs of stretching, deformation, or surface corrosion before installation and at every subsequent routine inspection, as these are the visible signs of fatigue that precede chain failure under load. Plastic-coated chains, in addition to providing corrosion resistance, reduce the risk of pinched fingers, a common minor injury during normal swing use, particularly among younger children.
Confirming Seat Attachment Points Are Rated for the Application
The seat itself -- whether a flat board seat, a bucket-style toddler seat, or a belt-style seat -- has manufacturer-specified attachment points designed to distribute the child's weight and movement forces appropriately across the chain connections. Using improvised attachment methods, such as tying rope directly through a hole not designed as a load-bearing attachment point, bypasses this engineering and significantly increases the risk of localized material failure at the point of attachment under repeated dynamic load.
Adjusting Seat Height and Suspension Length Correctly
Once the top and bottom connections are secured, the overall suspension length must be adjusted to provide a seat height appropriate for the intended user and to maintain the recommended ground clearance discussed earlier.
Recommended Seat Height for Different Age Groups
Seat height should be adjusted so the child's feet can comfortably reach the ground or a footrest when the swing is at rest, supporting safe entry and exit, while still providing adequate arc clearance during active swinging. As a general guideline reflected in commercial playground design standards, toddler and preschool swing seats are typically positioned with a seat height of approximately 355 mm to 455 mm (14 to 18 inches) above the ground at rest, while seats for school-age children are typically positioned somewhat higher, in the range of 455 mm to 560 mm (18 to 22 inches), though specific products and installations should always follow the manufacturer's stated guidance for the seat model in use.
Using Chain Tensioners or Length Adjusters Correctly
Many swing chains include adjustable links or tensioning hardware that allow fine adjustment of the hanging length without cutting or re-cutting the chain. When using these adjusters, ensure the adjusted link or fastener is fully engaged and, where applicable, secured with a cotter pin, lock nut, or other positive locking feature specified by the manufacturer -- an adjuster that is only partially engaged can work loose under the repetitive cyclical loading of normal swing use.
Maintaining Equal Length on Both Suspension Chains
Both suspension chains supporting a single seat must be adjusted to equal length and hung from points at the same height on the support beam. Unequal chain length causes the seat to hang at an angle, creates uneven load distribution between the two suspension points, and can contribute to the seat tipping or twisting unexpectedly during use -- particularly hazardous for toddler bucket seats where a sideways tip presents a meaningfully different risk profile than for older children using belt or flat seats.
Pre-Use Inspection Checklist Before First Use
Before allowing any child to use a newly installed swing seat, a systematic inspection of every connection point confirms the installation is sound. The following checklist should be completed in full before first use.
- Confirm the support beam shows no signs of cracking, splitting, or rot at or near the hanger attachment point, and that the beam is adequately sized and rated for the dynamic load of active swinging.
- Verify hanger bolts or screws are fully seated and tight against the beam surface, with no visible gap or movement when the hanger is pulled firmly by hand.
- Check that all S-hooks are fully closed with no visible gap, and that any carabiner-style connectors are in the locked position.
- Inspect chain links for damage, deformation, or sharp edges along the full length of both suspension chains.
- Confirm both chains are equal length and that the seat hangs level and square to the support beam, not twisted or at an angle.
- Verify the seat's structural attachment points show no cracking around the holes or fittings where the chains connect to the seat itself.
- Test the installation with an adult's body weight before allowing a child to use it, applying a gentle swinging motion to confirm all connections hold securely under dynamic load before introducing the actual intended user.
- Measure and confirm ground clearance and spacing from adjacent structures, swings, or support posts meets the minimum distances discussed earlier in this article.
Routine Inspection Schedule for Ongoing Safety
A correctly installed swing does not remain permanently secure without ongoing inspection, since outdoor exposure and repeated dynamic loading both contribute to gradual wear at every connection point discussed above. The following table provides a general inspection schedule reference for home and small-scale installations.
| Inspection Item | Recommended Frequency | What to Check |
|---|---|---|
| S-hook and connector closure | Monthly during regular use season | No gap, no signs of opening or deformation |
| Chain link condition | Monthly during regular use season | No stretching, rust-through, or cracked coating exposing bare metal |
| Hanger bolt tightness | Every 3 months | No play or movement when hanger is pulled by hand |
| Support beam condition | Every 3 to 6 months, and after severe weather | No new cracking, splitting, rot, or insect damage near the hanger point |
| Seat structural integrity | Monthly during regular use season | No cracking around attachment holes, no UV degradation making material brittle |
| Ground surface beneath swing | Ongoing visual check before each use season | Adequate impact-absorbing surface depth maintained, no hard or exposed areas |
Ground Surfacing Beneath the Swing
Secure suspension hardware addresses the risk of the swing itself failing, but a complete safety approach also accounts for what happens beneath the swing during normal use, since falls from a moving swing are a normal and expected occurrence during typical childhood play.
Recommended Surfacing Materials and Depths
The CPSC Public Playground Safety Handbook provides specific impact-attenuating surfacing depth recommendations based on the fall height of the equipment. For swing seats, where the relevant fall height includes the additional height gained during active swinging motion, loose-fill materials such as engineered wood fiber, rubber mulch, or sand are commonly recommended at depths of at least 230 mm (9 inches) for fall heights up to approximately 2.4 meters, with unitary surfacing such as rubber tiles or poured-in-place rubber offering an alternative engineered solution tested to equivalent impact attenuation performance.
The Use Zone Extends Beyond the Swing's Resting Position
The protective surfacing area, often called the use zone, must extend significantly beyond where the swing hangs at rest to account for the full arc of motion during active use and the trajectory a child may travel if they fall or jump from a moving swing. The CPSC Handbook recommends the use zone in front of and behind a swing extend a minimum of twice the height of the pivot point measured from a point directly below the pivot, reflecting the substantial horizontal distance a child can travel when dismounting from a swing in motion.
Common Installation Mistakes That Compromise Security
Reviewing common installation errors helps identify and correct issues that might otherwise go unnoticed until a failure occurs during use.
- Using open hooks instead of closed-eye hangers: As discussed earlier, open hooks allow the chain to work loose over time through repeated dynamic motion, even when initially installed correctly.
- Leaving S-hooks partially open: A commonly overlooked step, an S-hook that has not been fully crimped closed will gradually open further under the cyclical loading of normal swing use.
- Insufficient hanger bolt embedment: Installing hanger hardware into shallow pilot holes or thin support material significantly reduces pull-out resistance and is a common cause of catastrophic hanger failure.
- Mismatched chain lengths: Unequal suspension chain lengths cause the seat to hang unevenly, creating both an uncomfortable and unstable seating position and uneven load distribution across the two attachment points.
- Improvised attachment methods: Substituting rope, wire, or other materials not specifically rated and designed for swing suspension in place of manufacturer-specified chains or attachment hardware introduces unknown and often inadequate load capacity.
- Installing on an inadequate support structure: Attaching a swing to a tree branch, beam, or frame that has not been confirmed structurally sound and adequately sized for dynamic swing loading is one of the most serious and least visually obvious installation errors.
- Neglecting ongoing inspection after initial installation: A correctly installed swing that is never subsequently inspected will eventually develop the wear-related issues discussed throughout this article, often without obvious external warning signs until a failure occurs.
Frequently Asked Questions About Securing a Children Swing Seat
What weight capacity should a swing seat and its hardware be rated for
The swing seat and all suspension hardware should be rated by the manufacturer for at least the maximum expected static weight of the intended user, with the understanding that the actual dynamic forces during active swinging will be considerably higher than this static rating due to pendulum motion and momentum. Always confirm the manufacturer's stated weight rating for the specific seat model and never exceed it, and select suspension chain and hanger hardware independently rated to handle the dynamic loads generated at that weight capacity.
How often should swing chains be replaced
There is no fixed universal replacement interval, as wear depends heavily on usage frequency, climate exposure, and the quality of the original chain material and coating. Chains should be replaced immediately upon discovering any visible rust-through of the protective coating, any stretching or deformation of individual links, or any other sign of material degradation identified during the routine inspections described earlier in this article, rather than waiting for a fixed calendar interval.
Is it safe to hang a swing seat from a tree branch instead of a dedicated frame
A tree branch can be a suitable support structure provided it is confirmed to be a healthy, living branch of adequate diameter, free from disease, cracking, or structural weakness, and rated by competent assessment to handle the dynamic loads of active swinging. Arborist guidance generally suggests a minimum branch diameter of approximately 200 mm (8 inches) for swing support, though this should be confirmed against the specific tree species, branch angle, and overall tree health rather than relied upon as a universal figure. Unlike a manufactured frame, a tree branch's structural condition can change over time due to growth, disease, or storm damage, making more frequent reinspection appropriate for tree-mounted installations compared to engineered frames.
What should I do if I notice a connection point has started to wear during a routine inspection
Remove the swing from service immediately and do not allow further use until the worn component is repaired or replaced with hardware of equal or greater rated capacity than the original. Continuing to use a swing with a known worn connection point, even if it appears to still be functioning, risks progressive failure under the next cycle of dynamic loading, and the cost and inconvenience of replacing a chain link, S-hook, or hanger bolt is minor compared to the consequence of a failure during active use.